Showing posts with label shed. Show all posts

Monday, April 2, 2012

Spring Projects

For the past few weeks I've been anxiously watching the weekend weather forecasts, fingers crossed for good weather.  I've got multiple projects started and more that I'm itching to start.  But a few days ago Charles politely suggested that perhaps I should finish a current project (or three) before I take on anything new.  He's probably right -  if because if there's such a thing as DIY-ADHD than I've definitely got it. 

About a month ago I finally gave up on the blue paint in the kitchen.  I had high hopes for it in the beginning, but after two years I had to admit it wasn't growing on me.  It took several tries to find a new color for the room - the pale yellow in the picture to the left lasted only a few days before being painted over with a more tan/gray beige.  Schwartz, by the way, loved having an 8 foot ladder in the kitchen.

Other recent interior projects included Cecilia's quilt - finished last weekend - and the living room baseboards.  The latter project has been delayed by attempts to match the color of the new baseboard to the original walnut trim.  A local paint store has graciously allowed me to take home various stains, and I'm getting closer but still not quite satisfied enough to finish the new baseboard.

Outside, I spent the first nice day this spring digging out a basement window on the north side of the house.  The yard around the house was raised a foot by previous owners and the basements windows (at least the ones that were not filled in with concrete) were in desperate need of attention.  We had temporarily dealt with this by blocking the windows with heavy foam board secured around the edges with expanding foam.  Classy, I know.  But the remaining north facing window is now dug out and ready to be rebuilt. 


The first layer is topsoil added by a previous owner.  The middle layer is concrete window well poured before the level of the yard was raised.  Below is a closer view of the window opening.  The window sill is completely gone and both sides are rotted beyond repair.

The window itself was salvageable and is currently resting in my mom's wood shop.  I replaced several panes of broken glass, reglazed the window, and primed it.  Cecilia put a first coat of paint on it tonight.  Our masons left a bag of mortar, so as soon as I get more cooperative weather I'll tackle rebuilding the window sill.

In the meantime I've continued on the shed project.  With help from Charles and my mom one of the doors built over the winter is now hung on the shed.


The bottom and inside edges of the door will be cut to size once the second door is hung, but I'm already so tickled with how this is looking. 

And finally, one last project that's in the works.  I've got my mom to thank for this again.  Over the winter she rebuilt the sashes for the springhouse windows.  They're in her workshop now (with the basement window) primed and ready for paint.  But before I primed them mom brought them over to be sure they fit the springhouse.  This is just a hint of what the finished windows should look like, but I'm pretty tickled with this as well.


Based on the forecast for this weekend hopefully I'll be able to share a bit more progress on these projects soon.  :  )


Sunday, February 26, 2012

Fourteen Months Later....

I got a phone call from my mom after church this morning asking if she could stop by with some sections of baseboard for our living room.  (A mere fourteen months after the last post on this topic here.)  I had no idea my mom had been working on these and the unexpectedness of her surprise made it even more exciting to see the boards against the wall and marked to length.  As I explained in my earlier post, recreating the profile on the upper portion of the baseboards proved to be a challenge.  But I'm lucky enough to have a mother employed at a woodworking shop and in the end her boss recreated the profile by hand - and did an excellent job.  Side by side, the new baseboard is an almost perfect match to the original.  For local readers who need any custom woodwork I highly recommend Brad's Woodworks of Attica (and not just because my mom works there!)


Other projects are progressing as well.  The shed doors are resting in the shop, just waiting for a nice weather day to hang them.  I'm anxious to see the doors and their hardware on the shed.  (But not quite anxious enough to stand outside in late February weather to install them!)

And Cecilia's quilt top is all pieced.  I'm using a darning foot for the first time to quilt it.  It's definitely a learned skill, but I'm having fun with it and I'm pleased with the results to far.

 Lastly, I've been lax in introducing our new house cat.  
Meet Schwartz, the luckiest of Ethel's litter from last spring:


The kids think Schwartz has been a great addition to the family.  
Tiny the Cat is a bit less enthusiastic, though.  : )

Tuesday, January 24, 2012

Winter Projects

Since I've been getting some none too subtle hints that I'm long overdue for a post here I decided to share a couple of pictures from two projects I'm currently working on.  The picture of Cecilia at right was taken a few weeks ago when I was just starting to build doors for the shed that dominated most of my posts from last summer.   Both doors are now completely built and only waiting for one last coat of paint before they will be hung.

And below is my other current project, it shows three (of an eventual eleven) rows for a scrap quilt I've been wanting to make for a while now.  I added the fourth row tonight.  There's something about piecing a quilt that's just perfect for chilly winter evenings!

Monday, November 28, 2011

Drip Edge

Since Kate asked on my last post - "Is that horizontal strip above the door a drip edge?" - I'll answer here.  Yes - it is a drip edge. 

To the right is a simple profile of how the drip edge fit together.  (Just pretend that the garish bright yellow and red are a more respectable tan and maroon - Homestead Resort Parlor Taupe and Carriage Door to be precise.)  I used my mom's SawStop table saw (and my dad's help) to make the angled cuts and everything fit together pretty easily.

The drip edge is functioning exactly as intended.  I know this because at the end of my last Saturday of outdoor work I spent 40 minutes on a stepladder in the rain wiping Carriage Door-tinted rain splatters off of the Homestead Resort Parlor Taupe drip-edge.  (It had been overcast all day, but the forecast for that Saturday had no mention of "rain" and given my dwindling number of days with temperatures above freezing I figured I would be safe painting on a forecast of "mostly cloudy".)

The hinges and latch for the doors that will go under this drip edge finally arrived last Friday, so I should be moving on to door building soon.

Sunday, November 20, 2011

In the Details

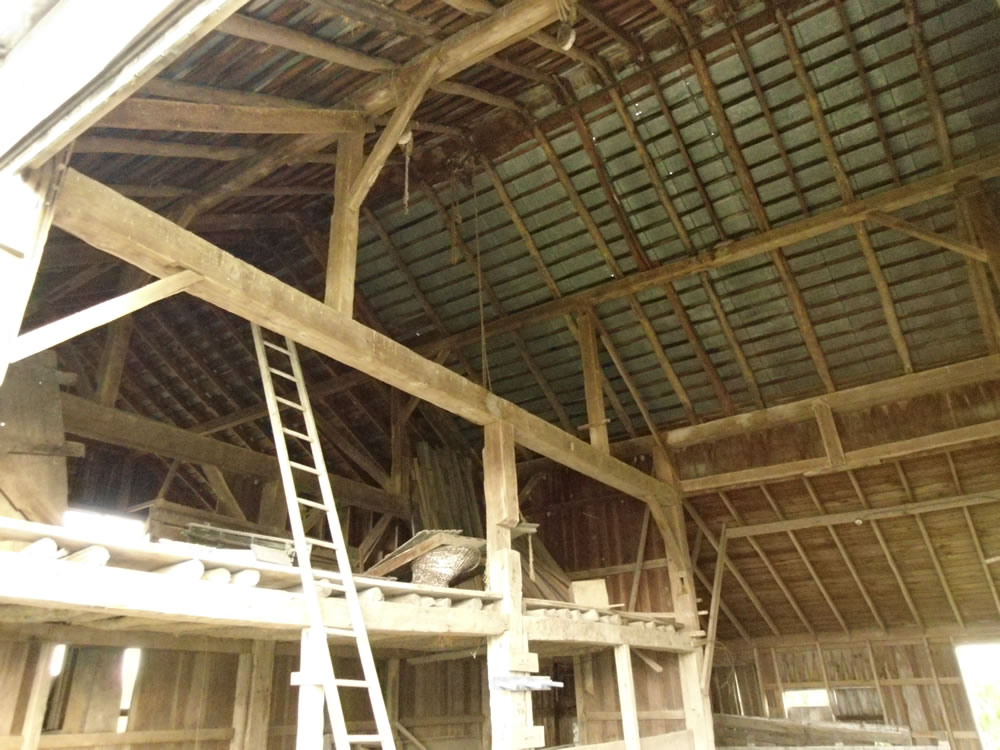
There's an old barn just south of here on the county line that rests quietly in a grove of trees.  


I've been known at times to take a slightly longer route than necessary just so I could enjoy the scene pictured above.  Still, I had been driving by this barn for several years before I noticed a little detail near the gable peak.


See it?

This whole summer as I was working on our little Einsel shed I've had the old barn in mind.  So earlier this summer, with camera in tow, I stopped at the old barn. Although I knew there were three stars in the old barn's gable, it was only from inside the barn that I realized the peak was a five point star while the two lower were six point stars.


And so, the south facing gable peak of the Einsel shed:


I am so thrilled with how this turned out.  There's no corresponding interior picture from the shed, though.  Behind my stars are boards painted black with several holes drilled through to provide ventilation.  Secured to the front of the black-painted boards is a layer of screen to hopefully prevent wasps from nesting inside the shed. 

I've really enjoyed my work on this side of the shed, bringing to reality the details I've seen in my mind for so long.


Obviously, I'm not quite finished yet.  The upper right corner will continue out to incorporate the new awning, and I've got two doors to build and install.  With Thanksgiving and December around the corner I figure my outside work is basically done for the year, but I'm hoping my mom won't mind if I use her (heated) shop - and perhaps advice - while building the doors.  The door hardware I ordered is on backorder right now, so I've got a little time anyway.  (Oh, and since I'm guessing some may be curious, the thick wire hanging off of the roof is from the lightning rod.  I'm thinking eventually it will be rerouted to hang over the back of the shed instead of the front.)

I'll have two sides of the shed to finish next summer, but I'm quite pleased with what I've accomplished so far. 


Not too bad considering what the poor little building looked like last May:


: )

Thursday, November 10, 2011

South Side of the Shed

Here's a quick pictorial catch-up on the last couple weekends of work on the shed:


My goal is to get this side finished before winter.  If Mother Nature cooperates (and I can keep myself away from Wii Tetris) I think I'll make it.

Thursday, September 29, 2011

Shed Hardware

^ Not for the Einsel Shed ^
Last Sunday I drove 30 miles so that I would have more than one home improvement store to peruse for hardware for double shed doors.  Turns out I could have saved myself some time and just stayed home, because every store I went in had the same selection of generic T hinges as the local Lowe's.  Any size I could ask for, but all the same style - and not the style I had in mind.


So I came back home and after a few hours on the computer I found (and ordered) the following:


I can't wait for these to arrive!  Unfortunately, I'm going to have to be patient.  Despite being listed as "in stock" I got an email immediately after placing my order estimating that the hinges will ship in late October and the latch in mid November.  Disappointing to be sure, but not enough to send me back after those boring box store hinges.

Not much else to report here other than a few more salvage trips to the old Second Empire.  Tuesday I loaded the back of our little Ford Ranger down with bricks, and Wednesday (in the rain) my mom and I gave the truck another test by loading up four stone window lintels.  There's more rain tonight and Friday's already booked, but I want to get back this weekend for more bricks (and whatever else is too good to leave behind). 

Wednesday, September 21, 2011

My Favorite Color

It must be red.  Because I'm usually happy when I'm painting, but I'm only ridiculously happy when I'm painting something red.

 So I've quite enjoyed my last couple weekends of work on the west side of the shed:


Getting the salvaged barn siding hung has been more time consuming than I expected but I'm thrilled with how it is looking.  (And honestly, by now I should realize that every job is more time consuming than expected.)  


First, each piece of siding was primed and cut to length.  I then caulked the existing nail holes and the most severe cracks.  The first coat of red paint went on before the boards were hung, and the second coat once the wall was finished.  It's ship-lap siding, and I don't want unpainted sections of wood to appear as the siding contracts or swells.  The wood has a lovely aged look to it, but it's definitely still got a lot of life left in it.  Every third board had to be notched at the top to fit around roof joists and this salvaged siding cuts much harder than any of the new lumber I used rebuilding the shed's awning.

There are three ugly sides of the shed still to go, but the view coming up the driveway is already 100 times better.  Because instead of this:


It's now this:


This weekend looks like it may be a washout, but as soon as I'm able I plan to start work on the shed's south side next.

Friday, September 9, 2011

Curiosity and the Cat

I've moved from roofing to siding. Labor Day was spent on the west side of the shed.  I took down the corner boards, then took out and framed in the old window.  My father-in-law helped me wrap that side in tar paper, and then we put up four rows of furring strips.  The existing siding is very rotted, so we'll rely on the furring strips (which are screwed into the shed's very solid framing) to hold on the new siding.


By mid afternoon we had the first three pieces of siding cut to size and the kidlets were set up with paint brushes and a pail of primer.  If you look carefully at the picture to the right you will see that Neil's attention is not on his paint brush but instead on a kitten who came to help.  I figured there would be curious kittens and had warned the kids to gently move any kitties that came too close.  Two kittens acted as I predicted, cautiously creeping up the project, sniffing curiously at the primer's strange smell. And Neil did an excellent job redirecting. 

But one kitten acted in a way I definitely did not predict.  Throwing caution to the wind, Maude's most adventurous kitten approached the kids at a full run and without pause jumped . . . . straight into the gallon of primer.  Poor Neil didn't even have a chance to intervene.  

The poor kitten jumped back out almost immediately, leaving a splat of primer on the grass.  It clearly wanted to escape, but rather than running it executed a series of quick sideways leaps, leaving more splats of primer on the grass.


The next 15-20 seconds were pandemonium.   I was attempting to catch the kitten, which was still pathetically jumping through the grass.  The kids were screaming and yelling, and my father-in-law was laughing out loud.

Meanwhile, there were several thoughts running through my head:
1 - we can't let this kitten try to lick itself until we wash off this primer
2 - Crap! We can't just wash this off, it's an oil based primer!
3 - I think I better call a vet and see what they suggest
4 - Crap!  It's Labor Day and I'm sure the vet's office is closed

With the kitten wrapped tightly in an old rag, I dialed our veterinary's phone number.  As I feared, I got a message that the office was closed, but I left a message explaining our predicament.  I then held the kitten while praying that the vet would call back before the primer completely dried.  Luckily, she did.  The vet said to go ahead and use paint thinner to wash off as much primer as possible, and to follow immediately by a thorough washing with dish soap in warm water. 

By this time the kitten had pretty much resigned itself to its fate.  Using a rag soaked with paint thinner I carefully rubbed down all four legs, and then turned my attention to the very round kitten belly which was also covered in primer.  Luckily, the kitten's head and back were mostly clean.  I then switched to a warm dishwater bath.  By the time I was done the kitten was a pathetic little sight.  And it was shivering.  The day was chilly, so we put our now very contrite kitten up in a small cage in the kitchen for the night.  Besides keeping the kitten warmer while its fur dried, I also wanted to keep the kitten isolated.  I had done my best on the two baths, but I was still worried that the kitten might get sick when it began trying to clean itself.  I also didn't want Maude to get herself sick trying to bathe her kitten.  The kitten sat shivering in a corner of the cage and gave a few mournful meows.  After a few minutes I coaxed it into eating and drinking a bit. 

The next morning I woke up a bit early and walked with some trepidition across the quiet kitchen.  But when I lifted the towel draped over the cage the kitten (now christened 'Primer') stood up, stretched and meowed.  I took her out of the cage and gave her another good combing - during which I realized with a smile that Primer is learning how to purr.  Apparently having nothing worse than a slightly matted coat to show for her adventure, later that morning I returned Primer to her siblings and mother in the barn.

Hopefully Primer has shared her lesson with all of our other kittens and we won't have a repeat performance when we break out the red paint this weekend.  : )
Saturday, September 3, 2011

Let It Rain

The shed roof is shingled!


Even without addressing the siding, it's already quite an improvement over what it looked like when we bought the place:


Up next will be giving new life to the stack of barn siding we salvaged a couple of weeks ago.  It makes a deceivingly small pile when neatly stacked, but I know how much area this siding covered on its old barn and I'm pretty confident we'll have enough here for our project.


And in one more "let it rain" bit of news, at right was the view out our bedroom window Thursday night. 

Previously, the sump pump and gutters were all tied into a 4" footer tile that empties into the creek near the springhouse.  While it did okay in a gentle rain, in downpours it quickly became overwhelmed causing water to come through the basement walls, particularly at the northwest corner of the house.  It also became a problem during the flooding at the end of February when the creek rose high enough to cover the outlet of the footer tile, meaning the sump pump and gutters could no long drain.

The new tile is a 6" solid tile  that is supposed to be impervious to blockage by tree roots.  It empties into the creek at a point about five feet higher than the footer tile (high enough that it would not have been submerged even in this spring's flooding).  The sump pump and all of the gutters from the stone part of the house are tied into the new tile.  The old footer tile is still in place, and the contractor we hired thinks that with the pump and roof water all now directed to the new tile, the old footer should again be able to handle its load. 

There's a chance of thunderstorms later this weekend, and I've got fingers crossed that the new roof and the new tile both pass their first test.

Tuesday, August 30, 2011

Master of None

I was reminded several times last weekend that despite nearly two years of owning the Einsel House, I’m still very much an amateur at this home improvement stuff. I’m typically confident enough to jump into a project, but unlike some other DIY blogs you won’t find any detailed tutorial posts here. I’m too busy reading other people’s "how to" advice to write my own.

This realization came afresh last Saturday afternoon as I was shingling the new shed awning and had the sudden inspiration to title my next post "Butt Scoot". Obviously, I resisted that impulse. But let me explain. About once a week, always in the evening just after the kids have been tucked in, while Charles is reclined in his papa chair and I’m stretched out on the couch with a book, Tiny the Cat will walk into the middle of the living room, sit down with her absurdly long tail pointing straight behind her flat against the threadbare Oriental rug and, well, butt scoot. 

I remember getting home from work the day the new roof went on the kitchen and seeing six men walking around on the kitchen roof. And I remember watching our mason walking on the highest portion of our metal roof to inspect the old chimneys. I felt more than a twinge of anxiety watching, but he looked confident enough to dance up to the peak and pirouette.

And then there’s me. I’ve come a long way since my first tentative forays onto the awning I built earlier this summer. But when it’s time for me to make my way from my perch back to the ladder leaning against the awning’s lowest edge I don’t walk. I, well, butt scoot.

There have been other telltale signs that I’m not a very experienced roofer. When I ordered shingles, the Carter’s employee asked me if I needed roofing felt. I told him no, but while driving home I began to worry. I had tar paper, but I suddenly I had this nagging fear that roofing felt and tar paper might be two totally different things. A brief session with Google seemed to confirm that roofing felt and tar paper are interchangeable. So, tar paper down, I returned to the computer to learn how to make starter strip from full shingles.

The next issue came when I noticed the shingles have small strips of plastic on the back that cover the tar. My first instinct was to remove the plastic strips to expose the tar. But on closer inspection I noticed a faint stamp on each strip that seemed to say "Do Not Remove". So back to the computer I went and Google confirmed that it is indeed not necessary to remove the strips, the tar is supposed to seal right through them.  Laying the actual shingles has been pretty straight forward so far.  It's nice and repetitive, with just some constant attention to making sure everything is straight and evenly spaced.  I suspect the trickiest part will be the last 14 inches where the shingle roof will join with the existing standing seam roof.  I should find out in the next few days.  And I promise to share some pictures of my handywork soon!

Friday, August 12, 2011

Salvaging Barn Siding

 
Earlier this week we got permission to start salvaging siding any time.  We planned to start tomorrow but after learning that the contractor who is tearing down the barn also has permission to start his work any time, we decided we could fit a few hours of work in tonight.   Many thanks to my parents for their help.  We have much more of the same ahead of us tomorrow. 


I took the above picture shortly before we left tonight.  I like the lighting in it.  Although I am thrilled to be getting siding for our own shed, there's still a sadness to realize that this old barn will soon be no more. 

Tuesday, August 9, 2011

Updates, Updated

As the lack of posts here shows, I've not accomplished anything around the house lately.  But this time I have a good excuse - I spent the better part of 10 days one thousand miles from the Einsel House, and the lesser part of 10 days driving there and back.

I do have a few bits of news I can share though.  First, weeds can do an astonishing amount of growing in 10 days.

Second, thanks to my dad (and the wonderful brothers who now farm my parents' land) it looks like I again have barn siding to salvage for my shed project. 

Third, we have an estimate to deal with the flooding problems at the end of the drive.  However, we asked the county engineer's office for a second opinion and after looking at the problem they said any tile would be mostly a waste of money for two reasons - (1) it would need to be extremely large to deal with the heavy downpours that cause the problem and (2) because of where it would need to be located, any tile would quickly plug with chaff and other debris from the field.  The county engineer suggested with either (A) relocate the end of our driveway 20 feet or so south, or (B) wait until the current soybean crop is harvested so we have a better view of the problem area and then reassess the situation.  We're going with B.

Fourth, we still have kittens.  A dozen kittens to be exact.  Ethel amazed all of us, not only by having 7 kittens in her first litter, but also by managing to keep all seven growing and healthy.  If you're local and want a cuddly little buddy, let us know!

Fifth, although it was never mentioned here, I spent most of July trying to convince Honda to pay for a $2,000 repair needed on our van.  I had to fight way too hard for it, but just before crossing the Mackinac Bridge last Friday we got a call saying Honda has finally agreed to cover the necessary repairs!   This means we should still be able to have the back of the house repointed this year!

Toes in Lake Superior
And finally, a few highlights from our recent trip.  For Charles and I's tenth anniversary, my in-laws rented a cabin on a lake in northern Minnesota.  My father-in-law has made the trip annually for 30-odd years to visit both a friend made in Vietnam days and Minnesota's deer.  (Denny is always much happier to see Jim than the deer are.)

Fishing with her Grandpa


Neil enjoying table ball at the resort's play area

Every six year old girl's dream


Wednesday, July 27, 2011

Updates

Good News
Celia with one of the twin tiger kittens
We have kittens at the EH!!!  Maude's taking good care of her three little ones who are now ten days old.  Ethel's litter was born yesterday - there appear to be 6, possibly 7 (including at least one calico!).  And because my husband we are softies, we've also adopted twin tiger striped brothers that were dumped in a ditch.  Anybody need a good kitty or 4?

Not So Good News
Preservation Ohio recently announced their list of 2011 Ohio's Most Endangered Historic Sites and the Seneca County Courthouse and Seneca County Museum both made the list.  (The courthouse for the fourth time.)  At a recent meeting of the Seneca County Commissioners, Commissioner Jeff Wagner "made a motion to seek bids for courthouse demolition, but there was not a second. [Wagner] said he would have been remiss had he not made the motion."


Related and Better News
Following up on my earlier post, today's local newspaper reports that at their most recent meeting, the county commissioners "voted 2-to-1 to not sell the museum or any contents, including three paintings possibly created by the Hudson River School art movement."  As for Mr. Wagner, the most civil thing I can write here is to quote a Facebook user who said, "there is a certain political movement that wants to bulldoze the past; at the same time they claim to revere the past."


Not So Good News
It poured rain here again last weekend.  Somewhere around 4 1/2 inches overnight Friday into Saturday.  Although there's a footer tile around the house for the gutters to drain into, it is obviously not large enough to handle the volume of water these summer storms pour into it.  We're slowly accepting that we're going to need to dig it up and replace it with a larger tile.  We also have a new 6 inch deep gulley at the end of our driveway.  It's obvious that a permanent solution to this problem is going to involve more tile.

Since some might be wondering - The basement had water coming through the walls, but with the bypassed tile still in place the sump pump was able to keep up for the most part.  I've not ventured down to check the stone bridge, and I'm not planning to either.  There's nothing we can do for now so I'm trying to just not think about it.

Bragging News
Cecilia was completely thrilled with the cake I made for her 6th birthday.

(Charles thinks I'll have a hard time topping this next year.  I suspect he's right.)


Bat News

This year's crop of baby bats took wing earlier this month. I spent a couple of nights watching them fly out of the bat houses.  The babies are easy to identify, not only because they are smaller, but also because they flap their little wings so much more quickly than the full grown bats.  They're really rather cute.


In other bat news we have bats back in our attic.  Although the majority remain in the bat boxes, a fair number have noticed a small gap in the very corner of the eaves.  We had a local tree-trimming company lined up to come out with a bucket truck to install another one-way bat door, but they had to cancel because the truck was needed to clean up storm damage (see a few items above).  I still need to call and reschedule this.

Bad News
When we contacted the neighbor who told us last February that we could take siding from a barn on his property to let him know we were about ready to use the salvaged siding he apologetically told us he has sold his farm (and aforesaid barn).  This will obviously delay work on our shed.

More Not So Good News
Taking a good friend up on her offer (see the comments to this post) I went to Lowe's prepared to order roofing for the shed.  Only to find out that they can not match the 24" seams on the current shed (16" is the widest available). 

This next bit is a little difficult to explain.  There is a 14" strip on the original shed, immediately above where the new awning joins the old roof, where a previous owner removed the old standing seam roof.  Because I rebuilt the new awning using the old one as a pattern, this 14" strip still remains.  The transition strip available to change from 24" seams to 16" seams and to make the change in pitch only covers 7".  After considerable discussion with the salesman we had four options:

1 - partially dismantle the awning I just built, extending the joists and increasing the pitch so that the new joists would join the original roof at the top of the fourteen inches instead of the bottom;
2 - remove the rest of the standing seam from that side of the building and replace all of it with new 16" standing seam;
3 - use flashing to cover the remaining 7" so the resulting roof would have 24" seams on the top, 16" seams on the bottom, and a seven inch strip in the middle with no seams;or
4 - leave the remaining standing seam and shingle the new roof and the 14" strip above it.

I've tried to talk myself into #1 but I just can't.  #2 would double the cost and labor required for the job and that's something that we're not comfortable doing at this time.  If we went with #3 that flat seven inch section in the middle of the roof would drive me absolutely crazy.  So shingles it will be.


Expect it to be a couple weeks though before I resume work on this project.  As this post shows, I've got a few other issues demanding my attention at the moment.  And I've got kittens to spend time playing with and cuddling as well.  : )

Tuesday, June 28, 2011

A Busy Weekend

The new awning on the shed went up last weekend.  Most of the prep work was done weekday evenings last week.  I couldn't see anything wrong with the construction of the old awning (other than the fact that it had rotted away because it was never finished), so while dismantling it I kept some parts to use as patterns for the replacement roof.  Using these patterns, by last Friday I had the new joists all notched and angled, and the sistered joists for each edge of the new roof assembled.
On Saturday morning the framing for the new roof went up remarkably easily.  I was sidelined for an hour and a half over lunch while my drill battery recharged, but even with this delay by two in the afternoon the shell of the new awning was up.  


Sunday's work was more challenging.  With me on the roof and Charles on the ground, we lugged up sheets of plywood for the roof deck.  Because it was a Sunday, we didn't start work until about 11am.  But we worked pretty much straight through until around 8 that evening.  By then the plywood was all up and most of it was under tar paper.  For now, the project is on hold for the next few days while we explore our options. 

The original plan was to shingle the new awning roof and recoat the original metal roof over the shed itself.  That may still be the route we take, but before I climb back up onto that roof we're going to get some estimates at having a new metal roof put on the entire building.  The reasons are several. 

1 - We already bought three gallons of rust inhibiting primer for the existing metal roof, and wow is that stuff expensive!  By the time we prime and paint the existing roof we will have around $300 already invested, and shingles for the awning roof will add to this figure.  Although the current metal roof seems solid, I would hate to put that much money and work into recoating it only to have the rust pop through again a couple years down the road. 

2 - I've been skeptical all along about how the roof would look half standing seam and half shingle.  If we're going to have to invest a decent amount of money in this regardless, I think it would look better to have the entire roof be metal.   

3 - Despite doing a lot of it lately, I still don't like crawling around on the roof. 

4 - My parents have offered to contribute some of the cost of a new metal roof as an anniversary/early Christmas gift.  (I suspect this offer was made partly because my dad doesn't like the idea of his only daughter crawling around on the roof any more than his daughter likes doing the crawling.)


I've got my fingers crossed that estimates for a new roof are not too absurd.